Please follow these steps:
Launch PHPStorm
If you don't have PHP Storm, then:
- Get PHP Storm and install it on your computer. The URL is PHP Storm
Select “New Project” — name it “LCC”
Select “PHP Empty Project” — observe the noted location — realize that location is where the PHPStormProject Folder will reside on your computer.
Make sure the project is named “LCC” at the end of that location, like so:
/Users/teddsperling/PhpstormProjects/LCC
Please realize this is your computer file system and should NOT have my user name — the above is only an example of how it looks on my computer.
Click “Create”
You should see something like:
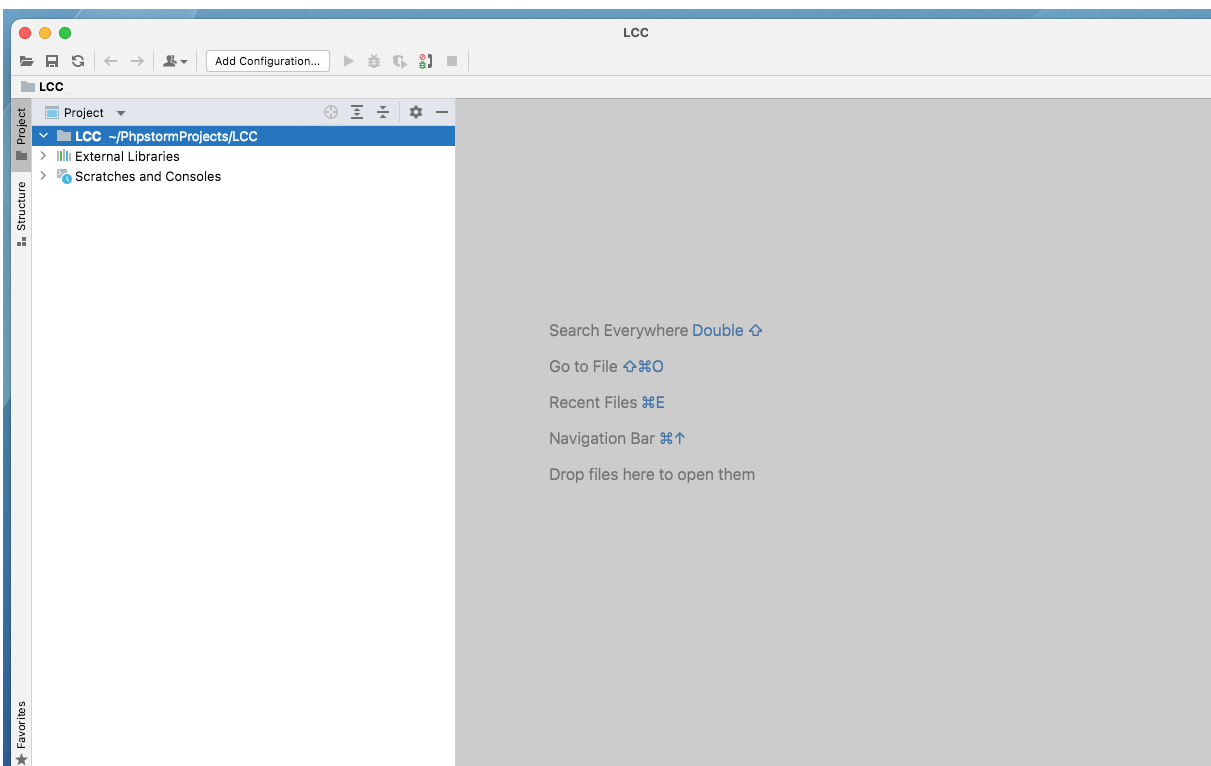
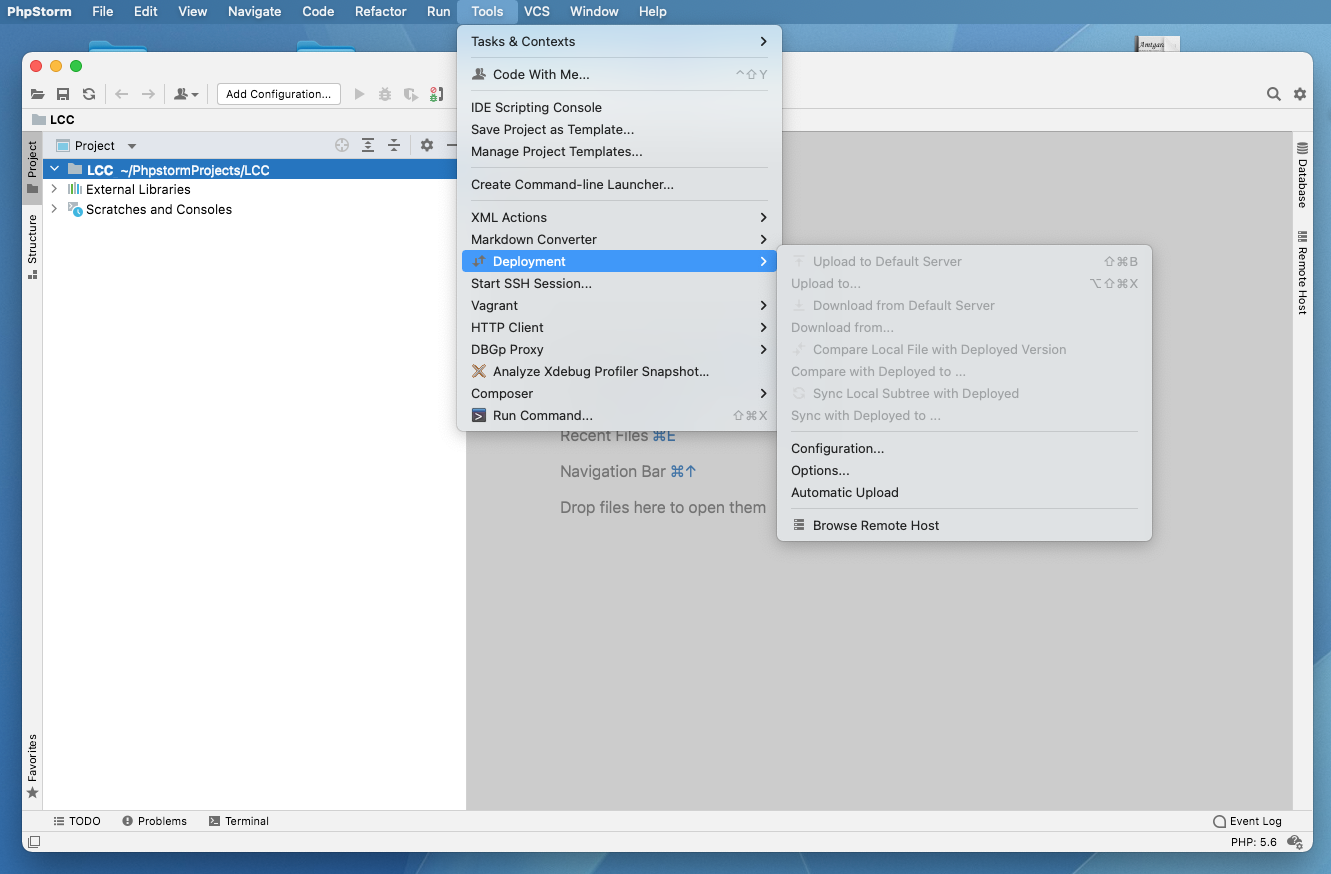
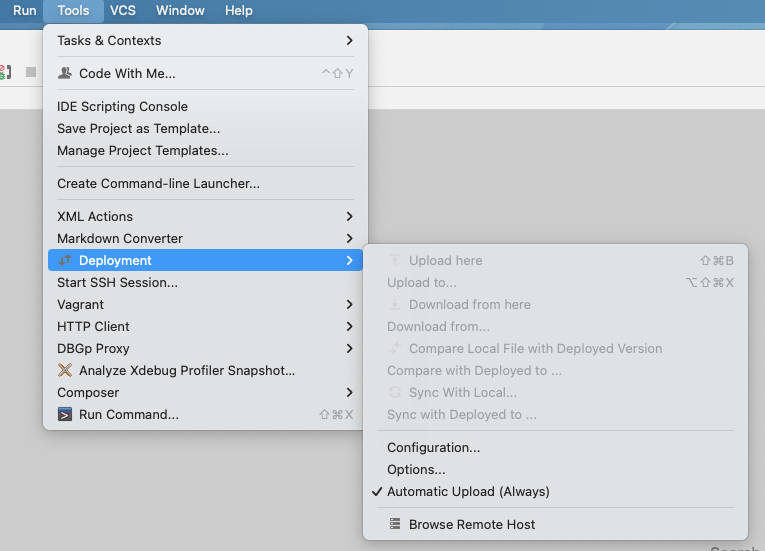
Click “Tools” in the main menu:
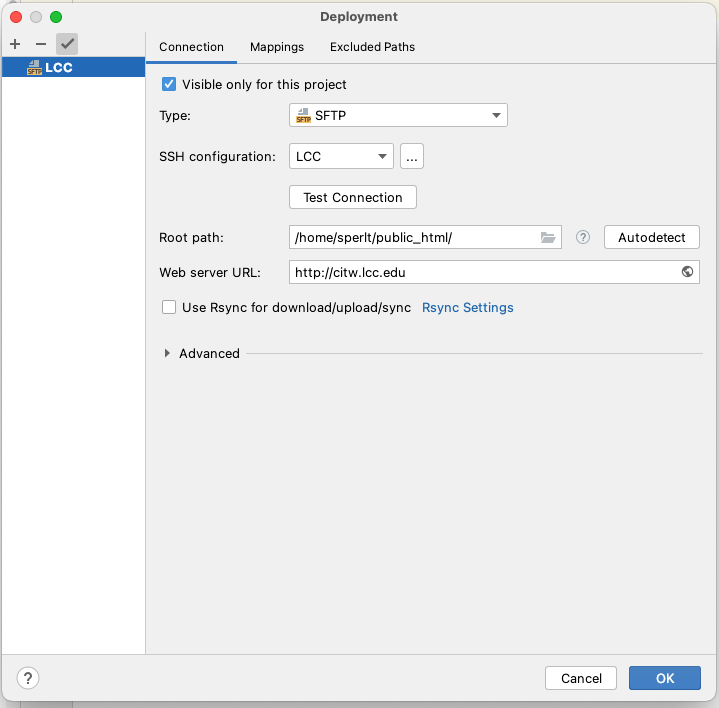
Select Deployment -> Configuration — a “Deployment” window should appear.
In Deployment click “+” to add a New Server as SFTP and name it “LCC” -- it should look like this:
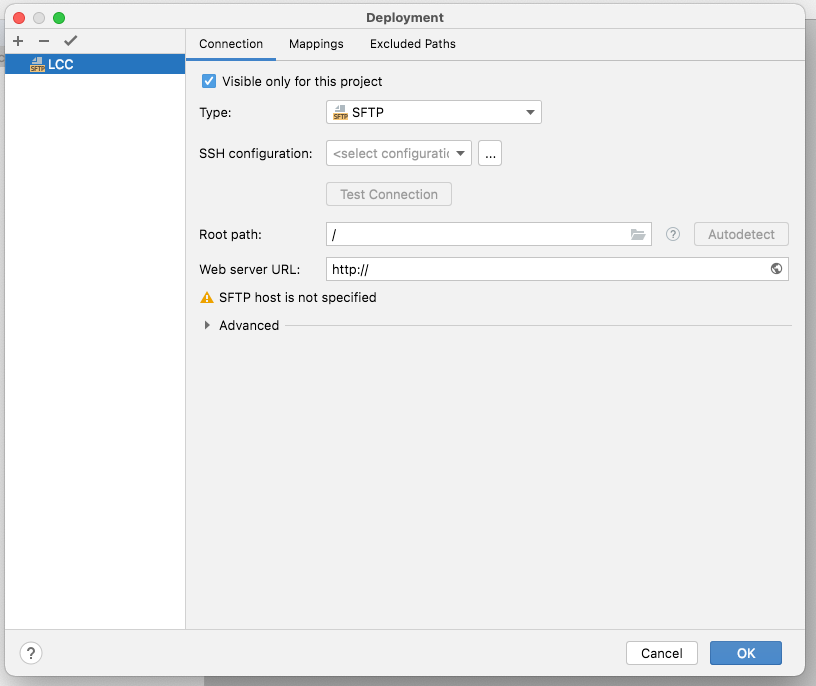
Add the following to the above form — use your own user name/id:
Root path:
/home/sperlt/public_html/
WebServer:
http://citw.lcc.edu
After which, then click OK and the window will close.
Go to Tools -> Deployment -> Configuration and the Deployment window will appear again.

This time it will have “LCC” in the SSH configuration:
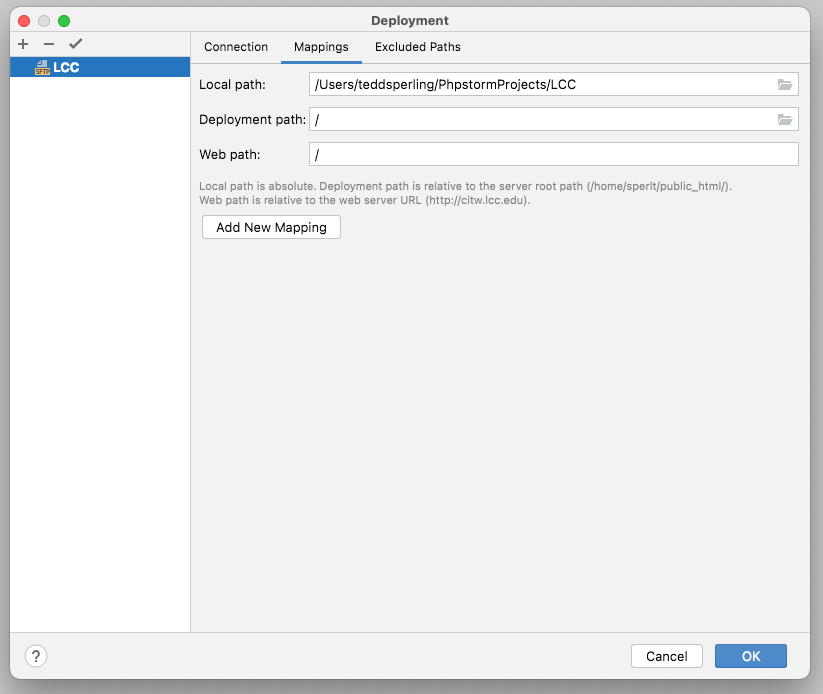
Click the “Mappings” tab and the following window should appear:
Please note, your Local path: should be different than mine.
In any event, make sure that both the “Deployment path:” and the “Web path:” are “/“.
Click the Connection tab (return to the previous window)
Now click immediately to the right of “LLC” (the small box with…) and the following window should open:
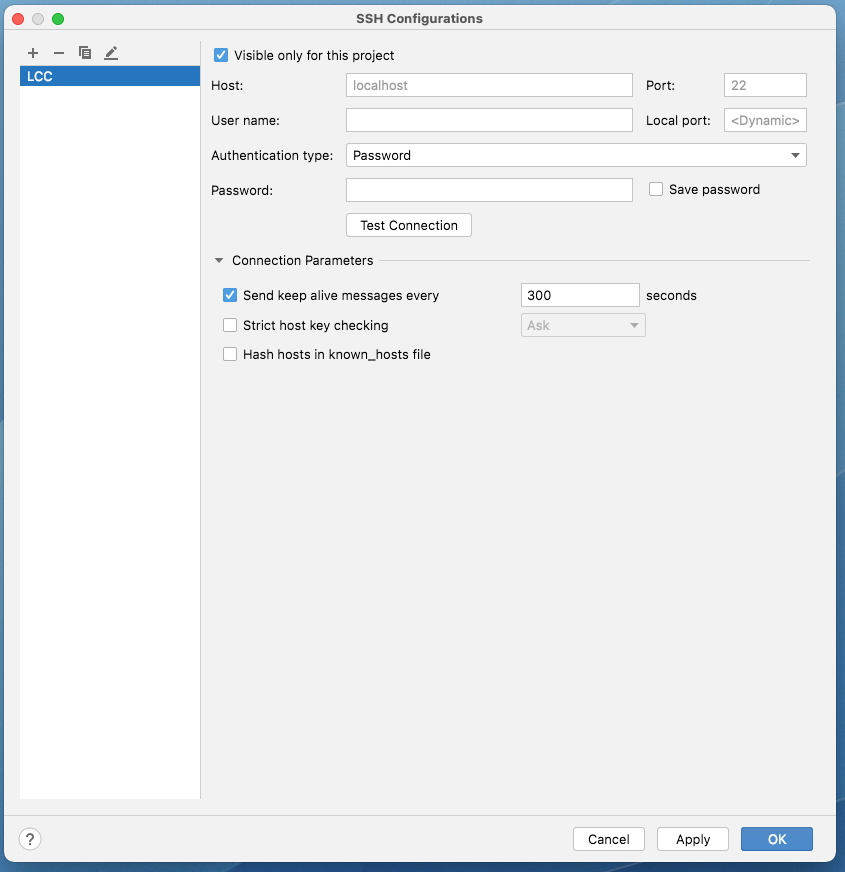
Add your USER NAME AND PASSWORD provided to you via your student email and check “Save Password”.
Remember, do NOT use your LCC password.
Click “Apply” and then click “Test Connection” and you should see your connection ( not mine ).
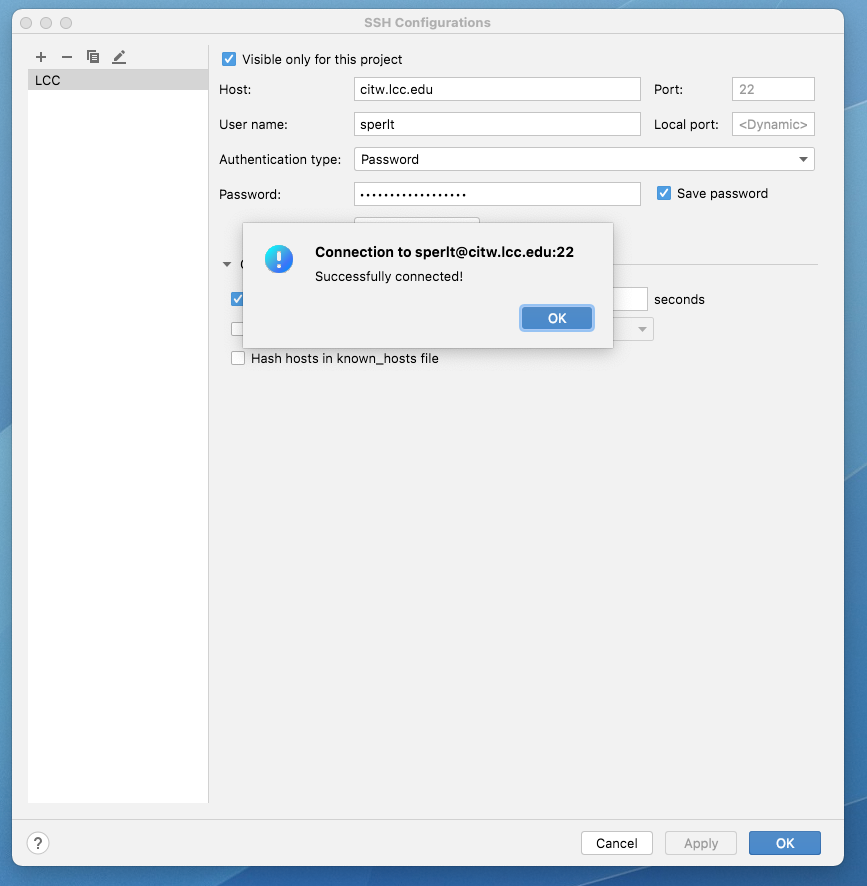
At this point you have successfully logged on to your LCC account. Close the SSH and Deployment windows.
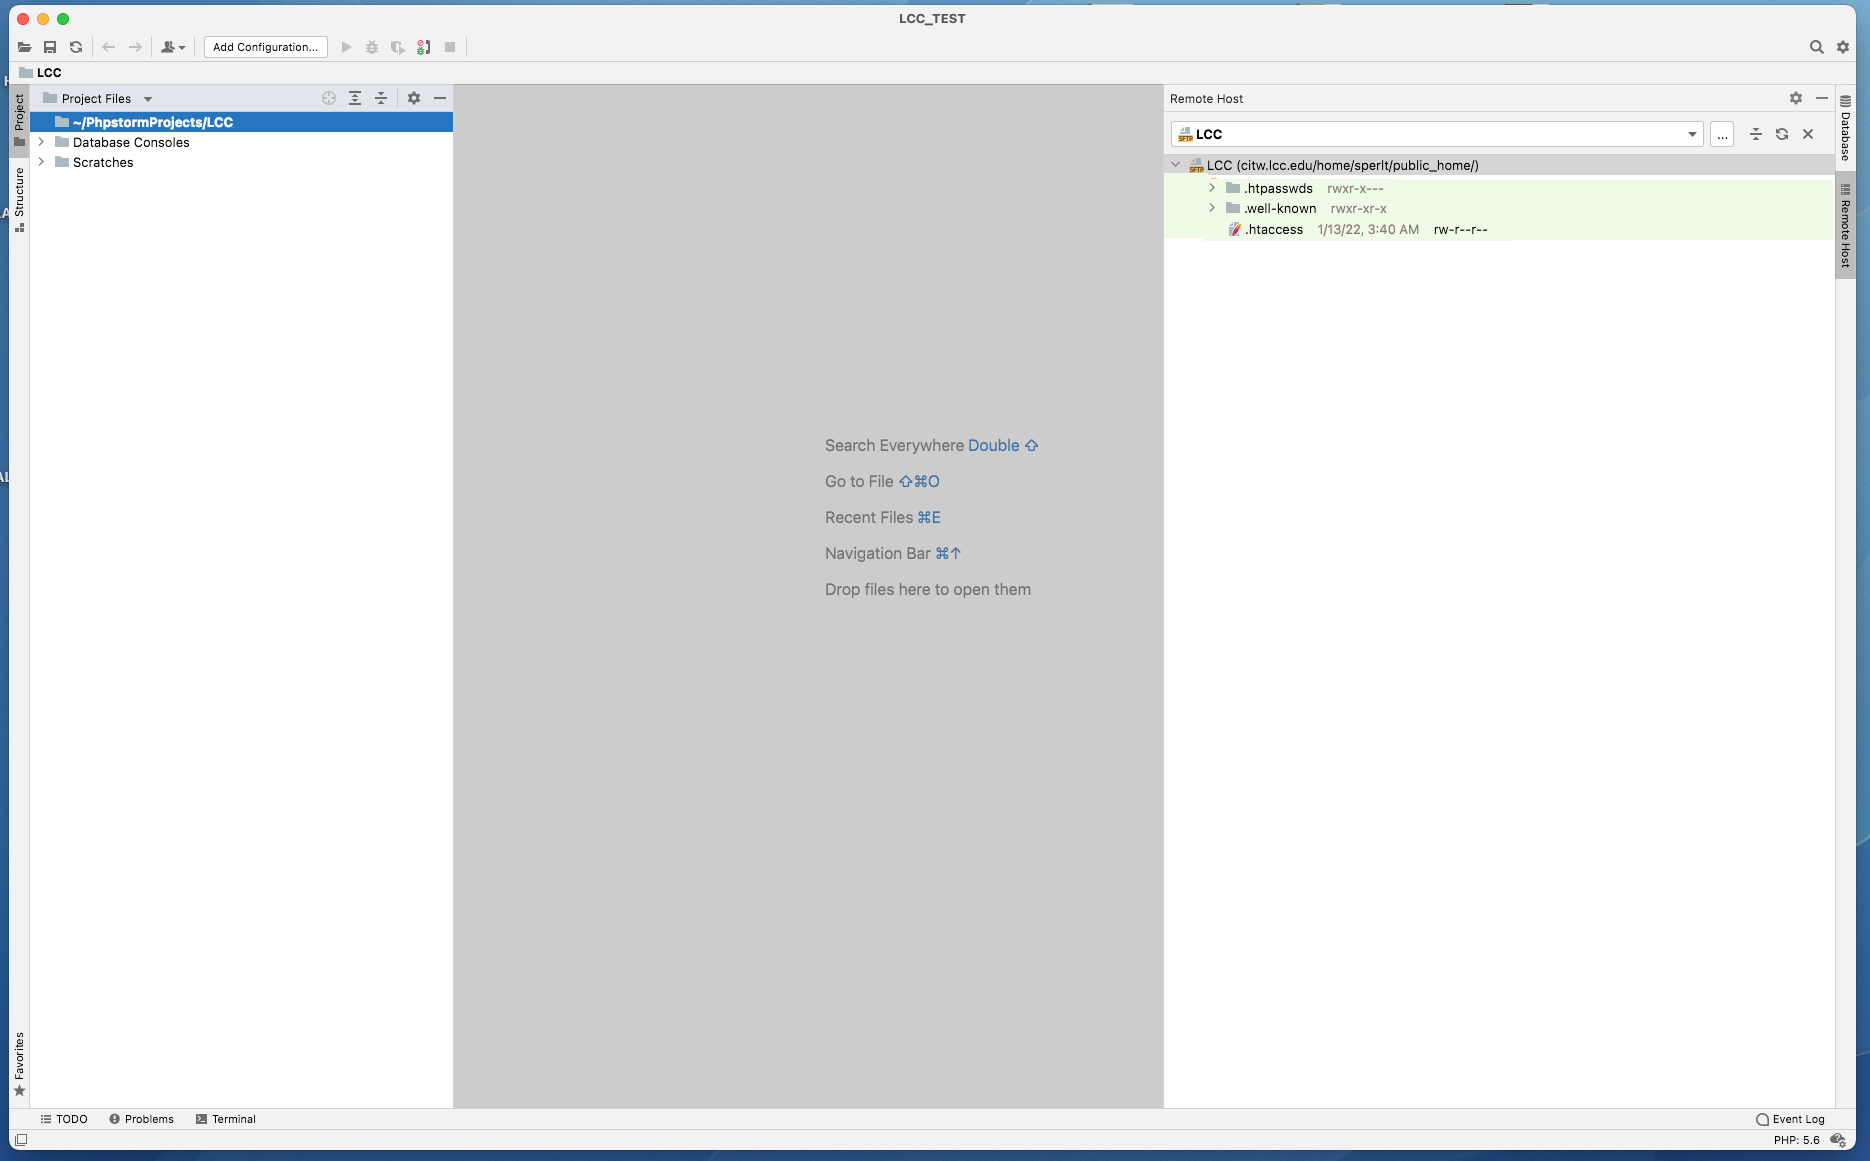
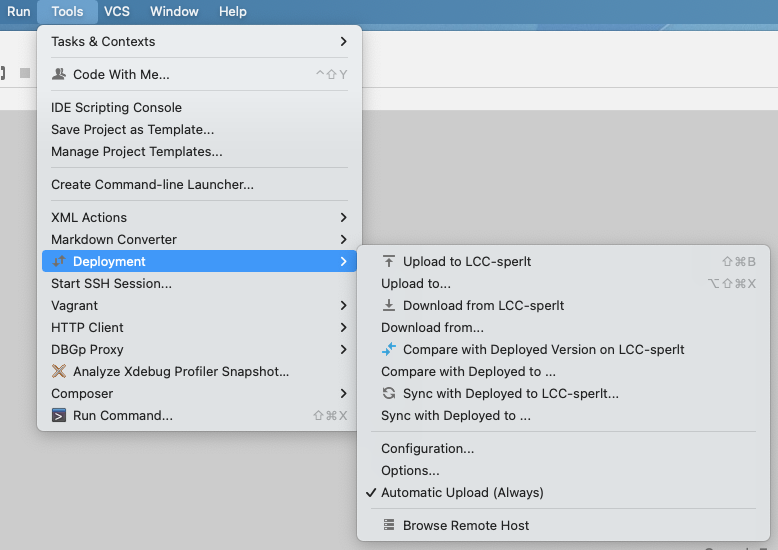
Goto Tools again and select Deployment and click “Automatic Upload” and “Browse Remote Host”.
After that, you should see the files on the right side of the window. Those are the files on the LCC Server:
After that, you need to create a “citw185” Directory with an “index.php” file inside that directory.
To create a new directory, right-click the LCC Project Folder on the top right of the window.

A drop down menu will appear. Select "New"
After clicking "New" a pop-out menu will appear select -> "Directory". Then a model window will appear asking for the name of the directory. Enter "citw185". Please note: ALL files on the server shall be lower-case without spaces. After you enter the name, a citw185 directory will appear below the LCC Project icon.

Now, right-click the citw185 directory and a drop down menu appear. Again select "New". This time, select "PHP File". Again a model window will appear asking for the name of the PHP file. Enter "index". Please note, when you are finished the IDE will create a index.php" file and it will appear inside the citw185 director. PHPStorm will automatically add the .php suffix.
Now, double click the index.php file and it will open in the middle of the IDE for you to enter the following code.
        <?php
        echo(“Your Name");
        ?>
After you finish entering the code, you should see the Directory and index.php on both your Computer (left side) and on the Server (right side).
If not, select the “citw185” Directory and then Tools -> Deployment -> Upload to LCC.
If “Upload to LCC” Is dimmed and you can’t select it, then review the previous steps and make sure everything is correct.
If it is not dimmed, then select “Upload to LCC" and the file should on the LCC Server. If not, then review the previous steps and make sure everything is correct.
Lastly, to confirm your account is internet live — start a Browser and enter the following URL. Note the ~ (tilde) before your user id.
https://citw.lcc.edu/~your-user-id/citw185/index.php
After entry, you should see your name in your account.
If not, then review ALL the above and make sure everything is correct.